
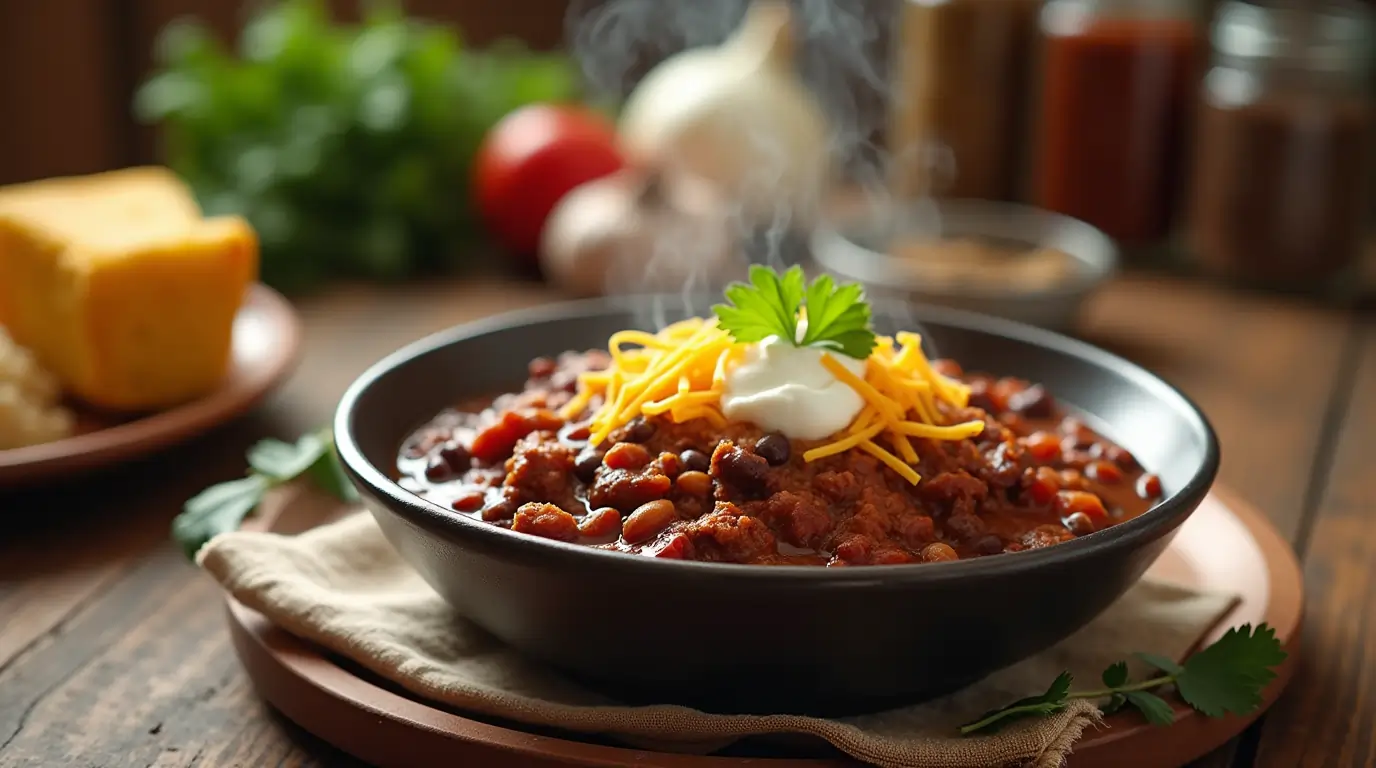
Deer Camp Venison chili is the ultimate comfort food for hunters and outdoor enthusiasts, offering a hearty, flavorful meal after a long day in the wilderness. Packed with lean, protein-rich venison and a bold blend of spices, this chili is perfect for warming up around the campfire and fueling your next adventure. Whether you’re cooking over an open flame or using a slow cooker, venison chili brings a rich, gamey flavor that pairs perfectly with classic chili ingredients like tomatoes, beans, and aromatic spices.
Unlike traditional beef chili, venison offers a unique taste and leaner texture, making it a healthier yet equally satisfying option. This recipe is not only easy to prepare but also ideal for large gatherings at camp, ensuring everyone enjoys a filling, protein-packed meal that’s both nourishing and delicious.
In this guide, we’ll take you through the step-by-step process of making the best deer camp venison chili, including tips for preparing the venison, selecting the right spices, and perfecting the cooking technique to achieve a thick, flavorful chili that’s sure to impress your campmates.
Table of Contents
Why Venison is Perfect for Chili
Nutritional Benefits of Venison
Venison is a nutrient-dense, lean protein source that makes it an ideal ingredient for a hearty deer camp chili. Packed with high-quality protein, a 3-ounce serving provides around 25-30 grams, helping with muscle repair, sustained energy, and keeping you fuller for longer.
Unlike traditional meats, venison is naturally low in fat and calories, making it a heart-healthy option that supports weight management without sacrificing flavor. Its low saturated fat content makes it easier to digest while providing a cleaner, hormone-free protein source.
Venison is also rich in iron, particularly heme iron, which is easily absorbed and helps boost stamina, prevent fatigue, and support healthy red blood cell production—perfect for outdoor activities that demand endurance.
In addition, venison is loaded with essential B vitamins (B12, B6, niacin) that aid in energy metabolism, brain function, and immune support, ensuring you stay focused and energized throughout your hunting trips.
Incorporating venison into your chili not only enhances flavor but also delivers a nutrient-packed meal that keeps you fueled, satisfied, and ready for the next adventure.
Unique Flavor Profile
Venison brings a distinct, earthy, slightly gamey flavor that sets it apart from traditional meats like beef. This bold taste comes from the deer’s natural diet of grasses, berries, and acorns, resulting in a clean, organic flavor without artificial additives. Its lean texture means a richer, more concentrated taste that pairs perfectly with robust spices like cumin, chili powder, and smoked paprika.
To enhance venison’s unique flavor in chili, techniques such as marinating, slow-cooking, and pairing it with bold ingredients like tomatoes and garlic help tenderize the meat and balance its gamey notes. Adding a bit of fat, such as olive oil or bacon, can also improve moisture and add depth to the dish.
Best Cooking Techniques for Venison Chili
To achieve the perfect venison chili, mastering key cooking techniques is essential. Slow cooking allows the lean venison to tenderize while absorbing the rich flavors of spices and ingredients, preventing dryness and enhancing depth. Using a slow cooker or Dutch oven for 6-8 hours on low heat ensures a melt-in-your-mouth texture.
Simmering is crucial for developing flavors without overcooking the meat. Keeping the chili at a gentle, steady heat allows the flavors to meld and the sauce to thicken naturally. Stirring occasionally and cooking for at least 1.5 to 2 hours results in a well-balanced dish.
Proper spice balancing helps enhance venison’s natural gamey flavor. A combination of chili powder, cumin, smoked paprika, and garlic creates a bold yet harmonious taste. Gradually adjusting seasoning and layering flavors ensures the perfect blend without overpowering the dish.
Additional techniques like searing the meat before slow cooking, adding a touch of fat for moisture, and letting the chili rest after cooking all contribute to a rich, hearty meal perfect for deer camp.
Venison vs. Beef
1. Nutritional Value: Venison is leaner, lower in fat, and packed with protein, iron, and essential vitamins, making it a healthier option compared to fatty beef.
2. Flavor Profile: Venison offers a rich, earthy, and slightly gamey taste that enhances the chili with bold, natural flavors, while beef provides a milder, fattier texture.
3. Texture and Cooking: Venison’s lean structure benefits from slow cooking to achieve tenderness, whereas beef retains moisture more easily due to its higher fat content, sometimes making chili greasy.
4. Environmental Impact: Venison is a more sustainable, free-range meat with fewer environmental impacts compared to farmed beef, which contributes to higher greenhouse gas emissions.
5. Availability and Cost: While beef is widely available, venison can be a cost-effective choice for hunters or those who source locally, though it may be pricier in specialty markets.
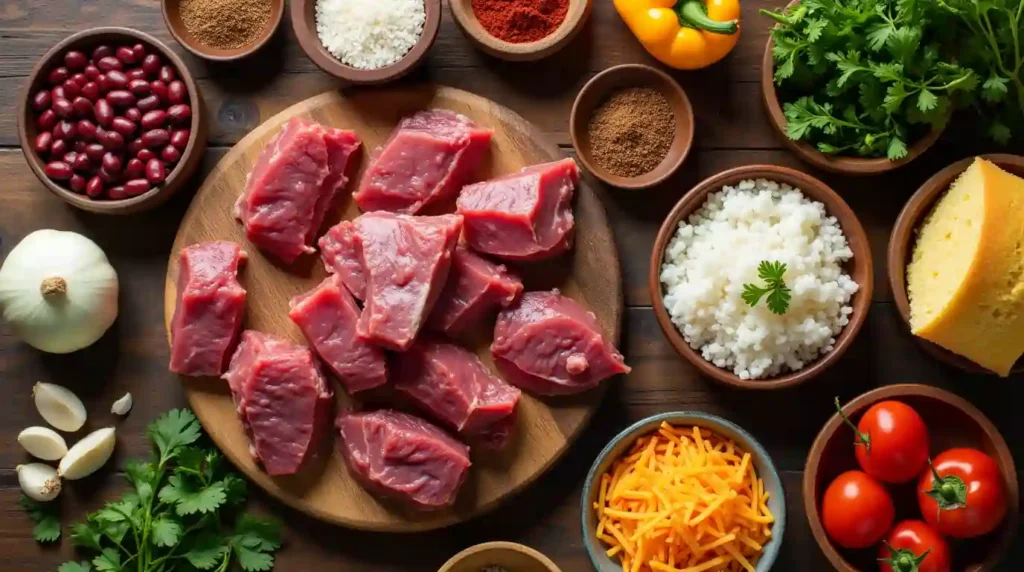
Essential Ingredients for the Perfect Deer Camp Venison Chili
Ingredients:
| Ingredient | Quantity | Description |
|---|---|---|
| Ground Venison | 2 lbs | Cooks quickly, absorbs spices evenly. |
| Venison Chunks | 2 lbs | Offers hearty bites, requires slow cooking. |
| Diced Tomatoes | 1 can (28 oz) | Forms the flavorful base, adds acidity and richness. |
| Kidney Beans | 2 cans (15 oz each) | Adds heartiness, protein, and fiber. |
| Black Beans | 1 can (15 oz) | Provides additional texture and flavor. |
| Pinto Beans | 1 can (15 oz) | Contributes to the chili’s hearty consistency. |
| Bell Peppers | 1 large (chopped) | Adds sweetness, crunch, and vibrant color. |
| Onion | 1 large (diced) | Provides a sweet and savory base. |
| Garlic | 3 cloves (minced) | Enhances overall savoriness and balances gaminess. |
| Olive Oil | 2 tbsp | Prevents dryness and enhances richness. |
| Chili Powder | 2 tbsp | Provides smoky, slightly spicy flavor. |
| Cumin | 1 tsp | Adds warmth and earthiness to complement venison. |
| Smoked Paprika | 1 tsp | Brings a touch of sweetness and smoky undertones. |
| Salt | 1 tsp | Enhances all flavors. |
| Black Pepper | 1/2 tsp | Adds mild heat and depth. |
| Beef Broth | 1 cup | Maintains moisture and creates a rich base. |
| Tomato Paste | 1 tbsp | Thickens the chili and enhances depth. |
| Worcestershire Sauce | 1 tbsp | Adds umami depth and enhances the meat’s flavor. |
| Corn (optional) | 1 cup | Adds sweetness and texture to the chili. |
| Jalapeños (optional) | 1 (sliced) | Provides an extra spicy kick. |
| Dark Chocolate (optional) | 1 tbsp | Balances acidity and deepens flavor. |
Meat Selection
Choosing between ground venison and venison chunks depends on your preferred chili texture and cooking method.
1. Ground Venison:
- Cooks quickly and absorbs spices evenly, creating a smooth, thick consistency.
- Ideal for those seeking a hassle-free, budget-friendly option with a uniform texture.
- Best suited for stovetop or slow cooker methods with added fat to prevent dryness.
2. Venison Chunks:
- Offers a hearty, meaty bite with a rich, rustic feel.
- Requires slow cooking to achieve tenderness, making it perfect for Dutch ovens or campfire cooking.
- Develops deep flavors over time and provides a satisfying chew.
3. Combining Both:
- Mixing ground venison with chunks creates the perfect balance of rich flavor and varied texture.
- Provides a thick base while adding hearty bites for an enjoyable eating experience.
Spices and Seasonings
Using the right blend of spices is key to enhancing venison’s rich, earthy flavor and creating a well-balanced chili.
- Chili Powder: The essential base that provides a smoky, slightly spicy flavor and helps unify all ingredients. Start with 1-2 tablespoons and adjust to taste.
- Cumin: Adds warmth and earthiness, complementing venison’s natural richness. Use 1-2 teaspoons to build depth and complexity.
- Paprika: Whether sweet or smoked, paprika brings a touch of sweetness and a smoky undertone that enhances the chili’s flavor and color.
- Garlic: A must-have for boosting the overall savoriness of the chili. Fresh or powdered garlic enhances the bold flavors and balances the gaminess of venison.
- Onions: Provide a sweet and savory base, helping to tenderize the meat and add natural moisture to the dish.
Spice Balancing Tips: Start with small amounts, let the chili simmer to develop flavors, and adjust seasonings gradually for the perfect blend. Combining these spices ensures a rich, hearty venison chili perfect for warming up after a long day outdoors.
Vegetables and Add-ins
Adding the right mix of vegetables and complementary ingredients enhances the flavor, texture, and nutrition of venison chili.
- Tomatoes: Form the flavorful base of the chili, providing acidity, richness, and sweetness. Options like diced, crushed, or fire-roasted tomatoes contribute different textures and depths of flavor.
- Beans: Kidney, black, and pinto beans add heartiness, protein, and fiber, making the chili more filling and nutritious. Combining different types of beans enhances texture and flavor.
- Bell Peppers: Green, red, and yellow peppers offer sweetness, crunch, and vibrant color, balancing the richness of venison and the heat from spices.
Additional Add-ins: Onions, corn, jalapeños, carrots, celery, and even a touch of dark chocolate or beer can deepen the chili’s flavor and create a unique taste profile.
Balancing Ingredients: To achieve the perfect chili, layer flavors gradually, avoid overcrowding the pot, and allow the chili to rest for better flavor integration.
By carefully selecting and balancing these vegetables and add-ins, your venison chili will be hearty, flavorful, and satisfying—perfect for a cozy meal at deer camp
Equipment Needed
Choosing the right cooking equipment is essential for achieving the best venison chili, whether you’re at home or outdoors.
- Dutch Oven:
- Provides even heat distribution and excellent retention, making it perfect for both stovetop and campfire cooking.
- Ideal for slow simmering, enhancing the flavors while keeping the chili warm for extended periods.
- Best for those who prefer a traditional, all-purpose cooking method.
- Slow Cooker:
- A convenient, hands-off option that allows the chili to cook slowly over several hours without constant monitoring.
- Perfect for busy schedules and ensures tender venison with rich, well-developed flavors.
- Best suited for home use or campsites with electricity access.
- Campfire Pot:
- Designed for rugged outdoor conditions, offering an authentic smoky flavor when cooked over an open flame.
- Requires careful heat management to prevent scorching but provides a hearty, rustic cooking experience.
- Ideal for deer camp settings and group gatherings.
Choosing the Right Option: Consider your cooking environment, convenience, and flavor preferences when selecting equipment to create the perfect venison chili experience.
Step-by-Step Guide to Making Venison Chili from Scratch
Step 1: Preparing the Ingredients
Proper preparation of ingredients is crucial for creating a flavorful and well-balanced venison chili.
- Chopping Vegetables:
- Dice onions, bell peppers, and tomatoes uniformly for even cooking.
- Mince garlic finely to enhance the dish’s aroma and depth.
- Keep vegetables separate to add them at the right cooking stages.
- Seasoning the Venison:
- Use salt, pepper, chili powder, cumin, and smoked paprika to enhance the venison’s rich flavor.
- Allow the meat to marinate for at least 15-30 minutes to absorb the spices.
- Consider browning the meat before adding it to the chili for extra depth.
- Preparing Additional Ingredients:
- Rinse canned beans and pre-cook dried beans if needed.
- Have broth, tomato paste, and oil ready for seamless cooking.
- Organize all ingredients to streamline the cooking process.
Step 2: Browning the Venison
Properly browning venison is essential for enhancing flavor and maintaining a juicy texture in chili.
- Preheat the Pan:
- Use a cast iron or heavy-bottomed pan over medium-high heat to ensure even browning.
- A well-heated pan prevents sticking and helps achieve a golden crust.
- Add Fat for Moisture:
- Since venison is lean, add olive oil, butter, or bacon grease to prevent dryness.
- Use about 1-2 tablespoons of fat per pound of venison for best results.
- Cook in Batches:
- Avoid overcrowding the pan to allow proper browning instead of steaming.
- Work in small portions to ensure each piece develops a rich, caramelized crust.
- Season Before Cooking:
- Lightly season venison with salt, pepper, and spices before browning to build flavor early on.
- Avoid over-seasoning initially, as additional flavors will develop during simmering.
- Deglaze the Pan:
- After browning, use broth or canned tomatoes to loosen flavorful browned bits (fond) from the pan.
- This step enhances the chili’s depth and richness.
Common Mistakes to Avoid: Overcooking, cooking at too low heat, and skipping the deglazing step can result in dry, flavorless venison.
Step 3: Simmering to Perfection
Simmering is crucial for developing deep flavors and tenderizing the lean venison in chili.
- Ideal Cooking Times:
- Stovetop: Simmer on low for 1.5 to 3 hours, stirring occasionally.
- Slow Cooker: Cook on low for 6-8 hours, or high for 3-4 hours for a quicker option.
- Campfire: Maintain a steady heat for 2-4 hours, stirring frequently.
- Low and Slow Cooking Benefits:
- Prevents the venison from becoming tough and dry.
- Enhances flavor by allowing ingredients to meld together.
- Gradually thickens the chili for a hearty consistency.
- Simmering Techniques:
- Stir occasionally to prevent sticking and burning.
- Keep the lid slightly ajar for a balanced texture.
- Taste and adjust seasoning throughout the cooking process.
- Common Mistakes to Avoid:
- Cooking at too high heat, which can make the venison tough.
- Adding too much liquid initially; start with less and adjust as needed.
- Not allowing enough time for flavors to fully develop.
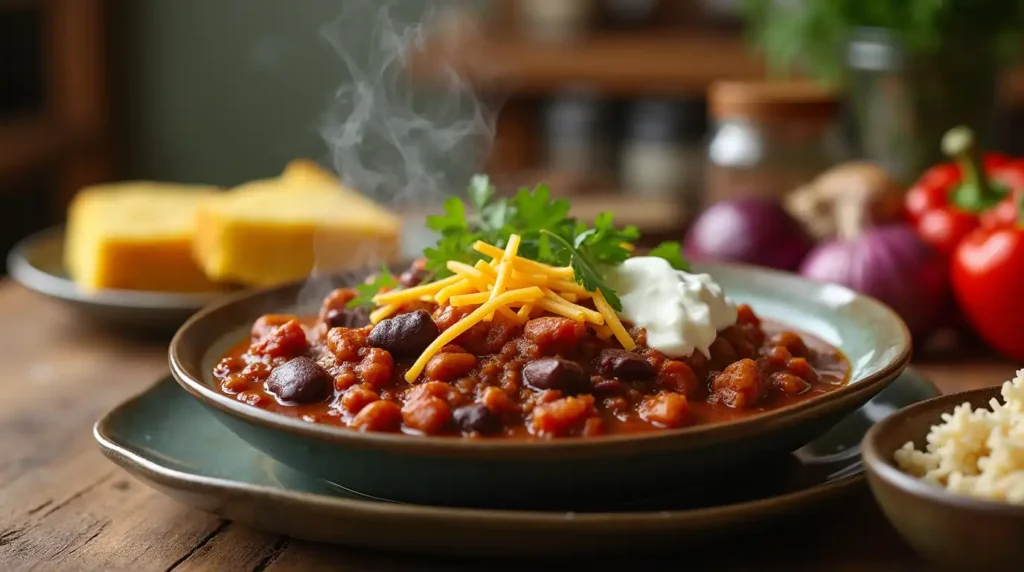
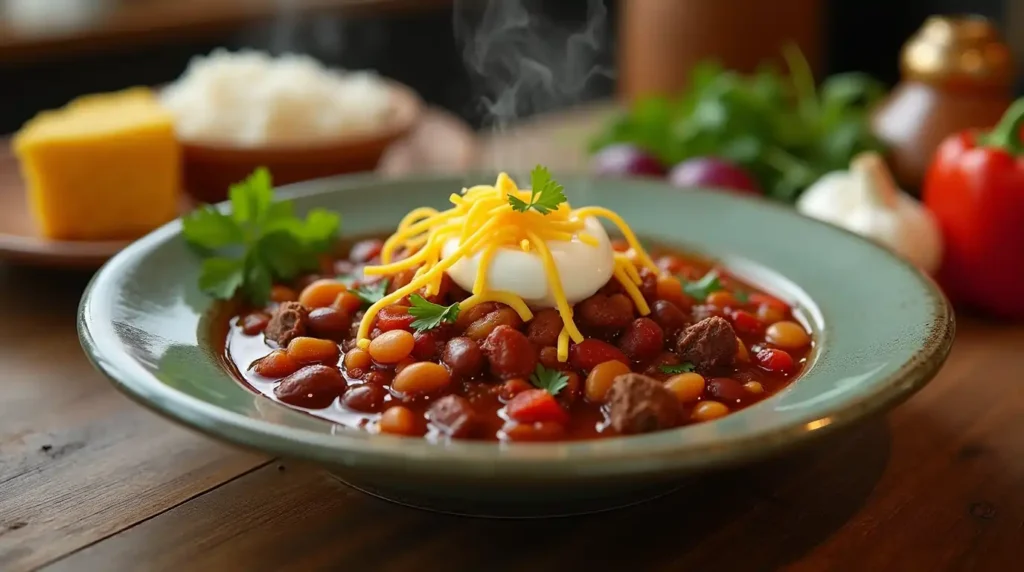
Step 4: Serving Suggestions
Enhancing your venison chili with the right sides and toppings creates a satisfying and well-rounded meal.
- Cornbread:
- A classic side that adds a slightly sweet contrast to the rich, savory chili.
- Variations like jalapeño cheddar or honey cornbread can provide extra flavor.
- Serve warm with butter or honey for a comforting touch.
- Cheese Toppings:
- Shredded cheddar, Monterey Jack, or pepper jack cheese melt into the chili, adding creamy richness.
- Crumbled cotija or queso fresco offers a salty, tangy contrast.
- Freshly shredded cheese enhances texture and flavor.
- Sour Cream:
- Provides a cool, tangy balance to the chili’s heat.
- A dollop on top adds creaminess and pairs well with spices.
- Greek yogurt can be a healthier alternative with a similar effect.
- Additional Garnishes:
- Green onions, avocado slices, cilantro, and crushed tortilla chips add freshness and texture.
- A squeeze of lime juice enhances flavor with a touch of acidity.
- Hot sauce can customize the spice level for each serving.
Presentation Tips: Serve chili in rustic bowls with a variety of toppings so guests can personalize their bowl, creating a delicious, comforting meal perfect for any occasion.
Tips and Tricks for the Best Deer Camp Chili Experience
How to Prevent Venison from Drying Out
Venison’s lean nature requires special attention to maintain its tenderness and moisture throughout cooking.
- Incorporating Fat:
- Add fat directly to the meat, such as bacon grease, butter, or olive oil, to enhance moisture.
- Mixing venison with higher-fat meats like pork or beef can improve texture and flavor.
- Use fatty ingredients like cheese or avocado as natural moisture boosters.
- Optimal Cooking Methods:
- Low and Slow: Simmering venison at a gentle heat (190-200°F) over several hours helps break down muscle fibers and retain moisture.
- Searing First: Browning the meat before slow cooking locks in juices and enhances flavor.
- Moisture-Rich Cooking: Use broth, tomatoes, or beer to maintain juiciness during the cooking process.
- Additional Moisture Retention Tips:
- Avoid overcooking; venison is best at an internal temperature of 130-145°F.
- Let cooked venison rest before serving to allow juices to redistribute.
- Use a partially covered pot to retain moisture without making the chili watery.
- Common Mistakes to Avoid:
- Cooking at high heat for too long can lead to dryness.
- Skipping the addition of fat results in tough meat.
- Over-stirring can break down venison, leading to a grainy texture.
Spice Level Customization
Customizing the spice level in venison chili ensures that it suits everyone’s taste, from mild to fiery.
- Adjusting for Milder Flavor:
- Use mild chili powders like ancho or pasilla.
- Remove seeds and membranes from fresh peppers to reduce heat.
- Balance spice with dairy additions such as sour cream or shredded cheese.
- Increase tomatoes or broth to dilute the heat.
- Enhancing for More Heat:
- Gradually add cayenne pepper, diced hot peppers, or crushed red pepper flakes.
- Incorporate spicy ingredients like chipotle in adobo sauce for a smoky kick.
- Offer hot sauces or sliced jalapeños as toppings for customization.
- Balancing Spice with Other Flavors:
- Combine heat with sweetness (honey or brown sugar) for depth.
- Use acidic ingredients like lime juice or vinegar to mellow the spice.
- Layer spices gradually to control intensity without overpowering the dish.
- Serving Tips:
- Offer a variety of toppings so guests can personalize their spice level.
- Provide cooling options such as Greek yogurt or avocado slices for those who prefer a milder experience.
Meal Prep and Storage Tips
Proper meal prep and storage help maintain the freshness and flavor of venison chili for future meals.
- Refrigeration Tips:
- Allow chili to cool to room temperature before storing.
- Store in airtight containers for up to 3-4 days to retain flavor.
- Label containers with the date for easy tracking.
- Freezing Guidelines:
- Divide chili into portion-sized freezer bags or containers to simplify reheating.
- Ensure proper sealing to prevent freezer burn and maintain quality for 4-6 months.
- Thaw overnight in the fridge or use the cold water method for quicker thawing.
- Reheating Techniques:
- Stovetop: Heat over medium-low with occasional stirring; add broth if needed.
- Microwave: To guarantee consistent heating, reheat in brief bursts while stirring.
- Slow Cooker: Reheat on low for a few hours for effortless warming.
- Creative Ways to Use Leftovers:
- Serve over baked potatoes or rice for a new twist.
- Use chili as a filling for tacos or stuffed peppers.
- Make chili mac by mixing with cooked pasta and cheese.
Common Mistakes to Avoid
Avoiding these common pitfalls will ensure your venison chili turns out tender, flavorful, and perfectly balanced.
- Over-Seasoning:
- Adding too many spices can overpower the natural flavor of venison.
- Start with small amounts and adjust gradually.
- Balance spices with acidity (tomatoes, vinegar) or sweetness (honey, brown sugar) if needed.
- Cooking at High Heat:
- High temperatures can toughen venison and dry it out.
- Use low and slow cooking methods for the best texture.
- Keep the chili at a gentle simmer to allow flavors to develop without overcooking.
- Adding Too Much Liquid:
- Excess liquid can dilute flavors and result in a watery consistency.
- Start with a moderate amount of broth and adjust gradually as the chili simmers.
- Allow the chili to reduce naturally to achieve the desired thickness.
- Skipping the Browning Step:
- Failing to sear the venison results in less depth of flavor.
- Brown the meat before simmering to enhance richness and texture.
- Deglaze the pan to incorporate the flavorful bits into the chili.
- Overcomplicating the Recipe:
- Too many ingredients can overshadow the simplicity and richness of venison chili.
- Stick to essential flavors and avoid unnecessary additions.
- Not Letting the Chili Rest:
- Resting allows flavors to meld and enhances the overall taste.
- Let the chili sit for 15-20 minutes before serving for the best results.
FAQs
Can you freeze venison chili for later?
Yes, venison chili can be frozen for later, making it a convenient and practical meal option. Properly stored in airtight, freezer-safe containers or resealable bags, it stays delicious for up to 3-4 months. Allow the chili to cool completely before freezing, leaving space for expansion, and label it with the date and portion size for easy tracking. Thawing overnight in the refrigerator is the best method, but a cold water bath offers a quicker alternative. For immediate use, chili can be reheated directly from frozen on the stovetop with added broth to prevent drying. Microwave reheating in short intervals with stirring ensures even warmth, while a slow cooker offers a hands-off approach. Once reheated, venison chili can be enjoyed as is or used in dishes like baked potatoes, nachos, or burritos, making it a versatile and waste-reducing meal solution.
What’s the best way to tenderize venison for chili?
To achieve tender venison chili, marinate the meat with acidic ingredients like vinegar or citrus to break down muscle fibers and enhance flavor. Slow cooking at low temperatures, whether in a slow cooker or on the stovetop, helps maintain moisture and tenderness. Adding fats such as olive oil or mixing with pork or beef fat prevents the meat from drying out. Choosing the right cuts, like shoulder or neck, ensures better texture when cooked slowly. Using moisture-rich ingredients like tomatoes and broth during cooking aids in tenderization, while seasoning gradually enhances flavor without overpowering the meat. Consistent low heat and allowing the chili to rest after cooking improve texture and flavor absorption. For leftovers, reheat gently to preserve tenderness, and store in portioned containers for easy, flavorful meals later.
What is the shelf life of venison chili?
Venison chili lasts 3 to 4 days in the fridge when stored properly in airtight containers at 40°F (4°C) or below. Allow it to cool within 2 hours after cooking before refrigerating to prevent bacterial growth. Use airtight containers to retain moisture and prevent odors, and label them with the storage date. Signs of spoilage include off smells, color changes, mold, or an unusual taste. To extend freshness, reheat only what you need and consider freezing for up to 4-6 months. When reheating, ensure the chili reaches 165°F (74°C) for safe consumption. Proper storage and reheating practices help maintain flavor and food safety.
What are the best sides to serve with venison chili?
Venison chili pairs well with a variety of sides that complement its rich flavors and hearty texture. Classic options like cornbread, garlic bread, and biscuits provide a comforting contrast and help soak up the chili. Rice, quinoa, or couscous serve as hearty bases that balance the spice and stretch the meal. Fresh sides like coleslaw, avocado, and lime wedges offer a refreshing contrast, while dairy-based toppings such as sour cream, shredded cheese, and Greek yogurt add creaminess and balance the heat. Healthy options like roasted vegetables, steamed greens, or sweet potato fries provide added nutrition and texture. Grilled corn on the cob or stuffed bell peppers can also enhance the dish with new flavors. Pairing venison chili with beverages such as beer, red wine, or iced tea can further enhance the meal experience, making it satisfying and well-rounded.
Conclusion
A deer camp venison chili recipe is the perfect hearty and flavorful dish to enjoy after a long day in the great outdoors. Packed with rich, smoky flavors and lean, protein-packed venison, this chili offers a satisfying and nourishing meal that brings people together around the campfire. Whether slow-cooked to perfection in a Dutch oven, simmered in a slow cooker, or prepared over an open flame, venison chili is a versatile dish that can be customized to suit any taste preference. From selecting the right spices and ingredients to ensuring the venison remains tender and juicy, every step in the process contributes to a bowl of chili that’s both comforting and delicious. Pairing it with classic sides like cornbread, rice, or fresh toppings enhances the overall experience, making it an ideal meal for chilly nights and lively camp gatherings. Whether you’re a seasoned hunter or simply a lover of wild game, this recipe allows you to savor the rich flavors of venison while enjoying the camaraderie of deer camp.
How Would You Rate the Flavors?
There are no reviews yet. Be the first one to write one.